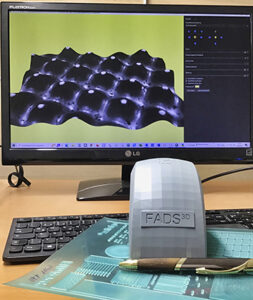
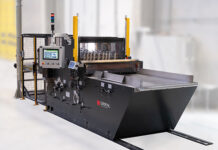
Sibress has extended the application range of the FADS3D measuring device with two helpful features that enable users to more specifically take into account specific requirements of the flexo plate material. Sibress FADS3D is an innovative measurement solution for two- and three-dimensional analysis of flexographic printing plates, which was launched on the market a few months ago.
 FADS3D uses a high-resolution camera to capture the surface as well as the recessed sections of dots and their base on the flexo plate. In addition to standard plate measurement functions, the instrument enables precise depth measurements based on digital images captured using Z-stacking (focus stacking). In practice, this means that Sibress FADS3D is also capable of accurately measuring the relief of flexo plates with a depth of more than 1350 microns. The increment per shot / layer is less than 5 microns when measuring in the Z-axis.
The measuring instrument provides images that are razor sharp from the plate surface to the intermediate depths of the halftone dots and image areas. In other words, everything from the dot surfaces to the base areas of the plates can be visually checked in the Versatile@flex software using one and the same image.
New: Further refined measurement of flexo plates with surface texturing and efficient support of laser calibration of LAMS flexo plate imagers
FADS3D now has new software functionality that, in conjunction with adjusted illumination, enables further refined measurement of halftone dots that have surface texturing patterns. The new feature ensures extremely sharp detection of the specific edge profile of such dots as a prerequisite for accurate measurement results across the entire tonal range.
The second innovation supports users of LAMS plate imagers in the regular calibration of the system’s laser. During the calibration process, the laser images groups of lines on the plate material, and it is necessary to determine the line with the smallest thickness as a basis for any necessary adjustments. FADS3D detects the exact thickness of all lines with only one measurement and indicates this in microns, which is a much faster and more reliable method than visually assessing the calibration element using a microscope. This new feature can also be used, for example, to accurately measure the bar width of bar codes on imaged LAMS plates.
Now FADS3D has been presented last September to a wider audience for the first time at the 2022 DFTA ProFlex event in Stuttgart, Germany. The device met with keen interest from trade visitors. According to Sibress Managing Director Michael Romanowski, the very positive feedback and the many discussions and demonstrations at ProFlex once again confirmed the market response.
True 3D images from an all-round perspective
As a unique highlight, Sibress FADS3D provides a high-resolution, perspective 3D view of the captured plate area. The visualization is freely selectable from 360 degrees so that the shoulder and flank areas of halftone dots, for example, can be examined from different perspectives. The measurement functions also include the determination of the flank angle.
As far as standard measurement functions are concerned, Sibress FADS3D can analyze screens from 28 to more than 240 l/cm (71 to >620 lpi) as well as FM, hybrid, and specialty screens. Parameters such as halftone value, screen, dot diameter and dot perimeter are instantly recognizable.
Other functions include statistics, storing measurement curves and automated creation of measurement reports complete with graphics. The depth value in µm is automatically determined during depth measurements and can be imported into an Excel file. The measurement histories obtained in this way are an important source of information, for instance when it comes to plate reusability. No comparable product in the market today offers this capability. Precise metrological verification of key parameters prior to reusing archived plates can reveal wear effects as well as storage-induced changes before these plates have a chance to compromise print quality and cause expensive press downtime.


